WAXHISPANO
Create Games On WAX Using Unity, Part 5 — Physics!

Create Games On WAX Using Unity, Part 5 — Physics!
02/25/2024
Hello and welcome to part 5 of my ultimate guide for creating video games on WAX Blockchain, using Unity. In the previous article, we checked if a user had a certain NFT in their wallet — and if they did, we directed them to the “Game Scene”, where they can actually play the game.
Well, that game scene doesn’t exist yet. But we are going to start creating the actual game mechanics in this article. Let’s jump right into it.
Create A New Scene
Before we can worry about the actual graphics/physics, we need to create a scene for the game. In your Project panel, navigate to Assets > Scenes, and create a new scene. Name your new scene GameScene.
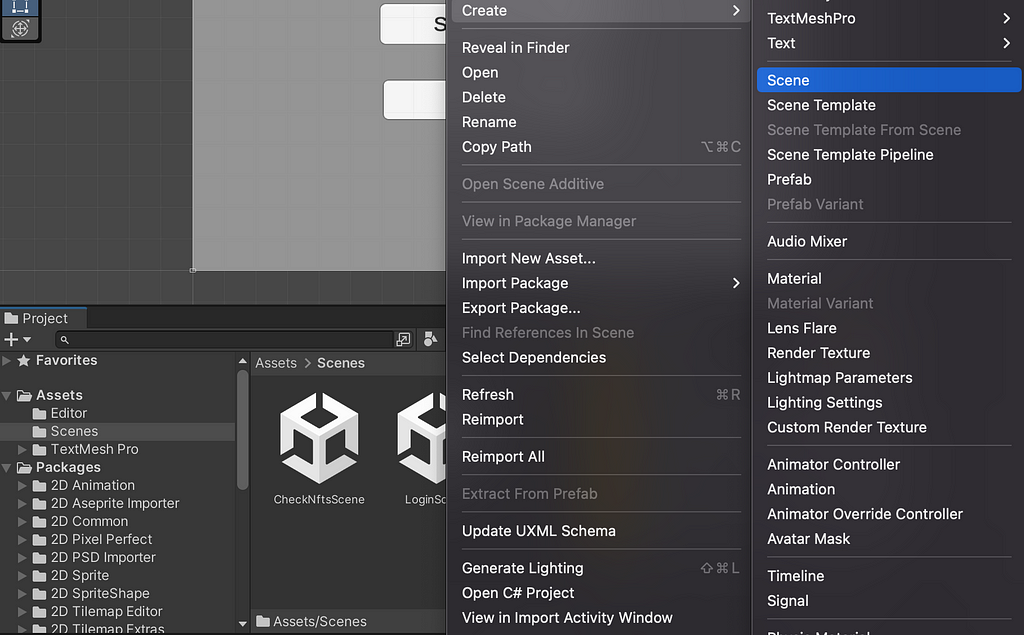
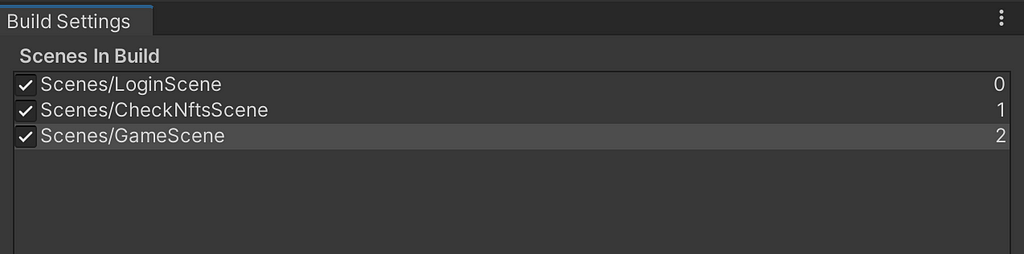
Also, make sure to add this scene to your build settings, just like we did with the previous scene. Go to File > Build Settings in the toolbar at the top of the screen. Drag your GameScene into the build settings panel, and make sure you have it last on the list!
Next, open up the GameScene in your Unity editor, by clicking File > Open Scene and then selecting the GameScene. You should now have a blank canvas to work with.
Creating The Layout
As I mentioned in the first article, my plan here is to create a game similar to Alleyway or Breakout, where a paddle hits a ball, the ball hits some bricks and scores points, etc.
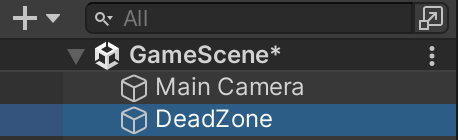
One thing that definitely needs to go into the scene is a “dead zone”, where if the ball enters that zone, it’s Game Over for the user. So, let’s start off by creating a new game object for this dead zone.
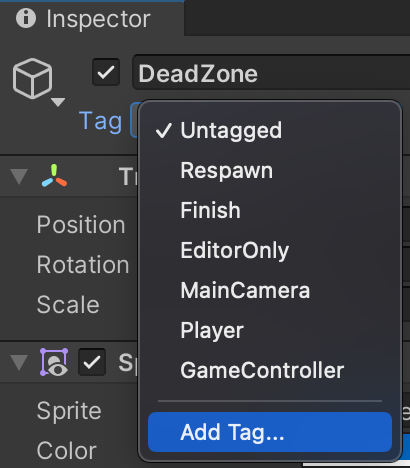
Right click in the Hierarchy panel, click 2D Object > Sprites > Square. Then rename the square to DeadZone. Your Hierarchy panel should look like this now:
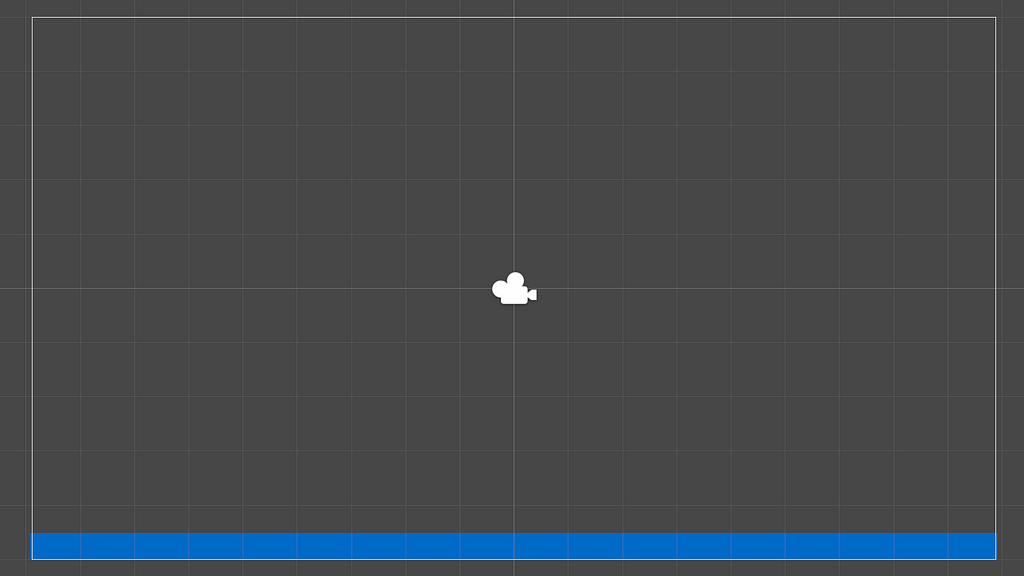
Next, we need to adjust the scale and position of our DeadZone (you can do this in the Inspector panel, you know how!). We want this dead zone to take up the whole width of our camera view, and we also want it to be down at the bottom of the camera view. Personally, I also changed the color of my dead zone to blue, but this wasn’t necessary at all.
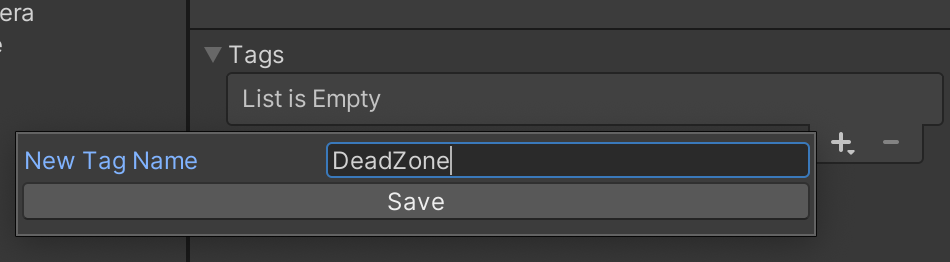
Next, we want to add a Tag to our DeadZone object, so we can end the game when the ball hits it. To do this, we can select “Add Tag” in the Inspector panel.
You will likely see an empty list of tags. Click the “+” icon to add a new tag, name it DeadZone, and save it.
Go back to your DeadZone object in the Inspector panel, and make sure to select the new tag that you just created.
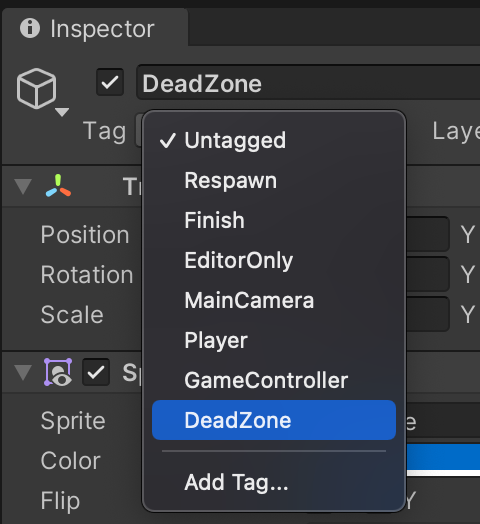
You might not understand why we just did that, but don’t worry — it will become clear in a bit once we use this tag in our game logic.
Next, we need to add a Box Collider 2D to our DeadZone object. We can do that by clicking Add Component > Physics 2D > Box Collider 2D in the Inspector panel.
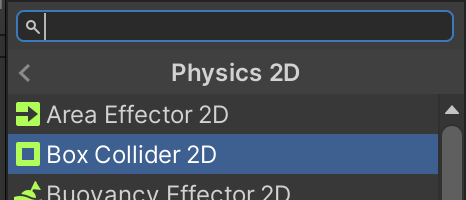
What this does, is make sure we are able to determine if another object (the ball) collides with our DeadZone. If it does, the user will lose the game.
Creating Our Paddle
Next, let’s create the paddle — this will essentially act as the “player” that we move around. Personally, I created a .png image in Photoshop to use as a paddle. You can use a png image as well if you like (I won’t cover how to use Photoshop in this tutorial), or you can just create another 2D Object > Sprites > Square if you want.
For me, I am going to use an image. So the first thing I will do is create a new folder inside my Assets folder, and name it Images.
Then, I will import my png file into Unity by dragging it into the Images folder.
Next, I will drag this image onto my Hierarchy panel, which will create a new game object. I also made the first letter uppercase, because I’m kind of sure that’s best practice maybe? LOL

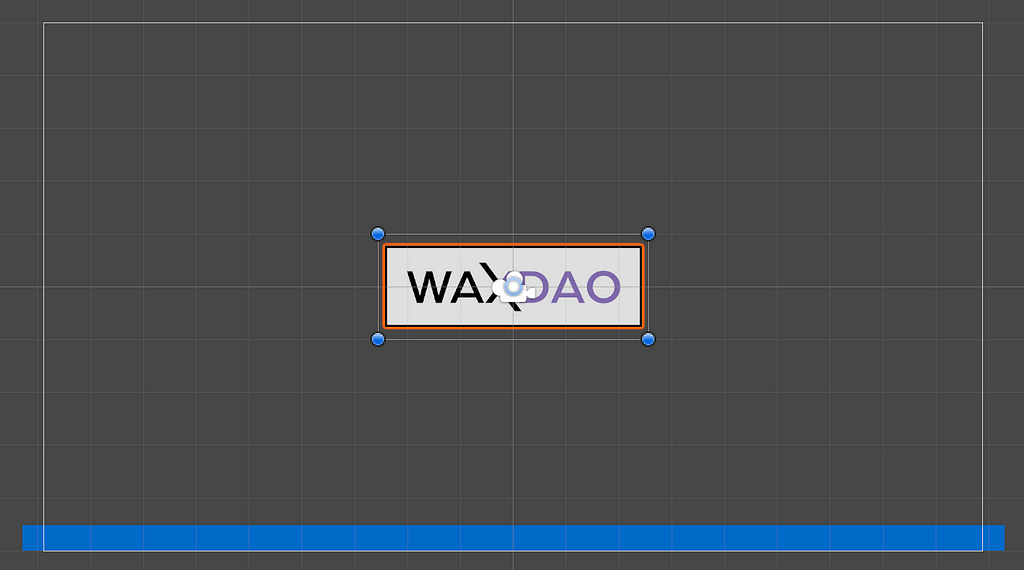
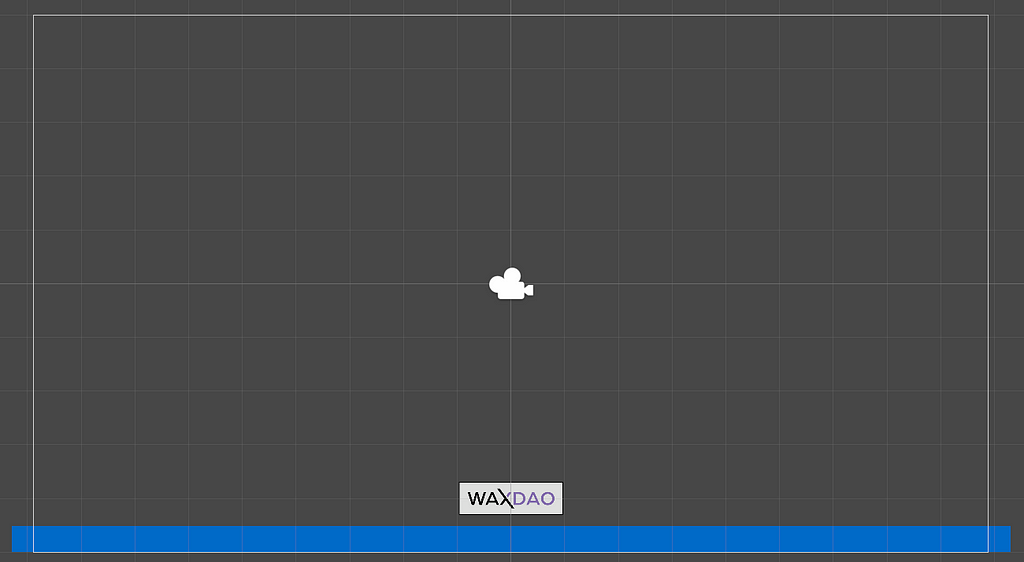
This paddle is obviously way too large, and I don’t want it in the center of the screen. It should be down near the bottom, not too far above the DeadZone. So I’m going to resize it, and move it down. The end result looks like this:
Adding Physics To The Paddle
Now that our paddle is positioned where we want it, we need to add some physics to it. This way, we can move it back and forth, know when the ball hits it, etc. To do this, we need to go over to the Inspector panel.
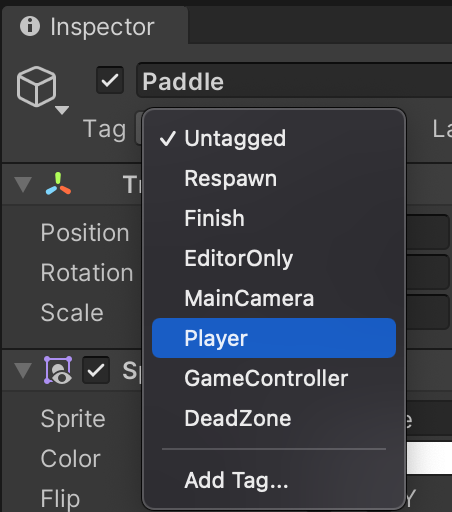
The first thing I’m going to do is give the paddle a Player tag.
Next, I’m going to click Add Component > Physics 2D > RigidBody 2D. This is what allows the paddle to actually move around, etc. We also need to add a Box Collider 2D so the paddle collides against other objects (specifically the ball, and the walls that we haven’t created yet). So click Add Component > Physics 2D > Box Collider 2D.
Your Inspector panel should look something like this now:
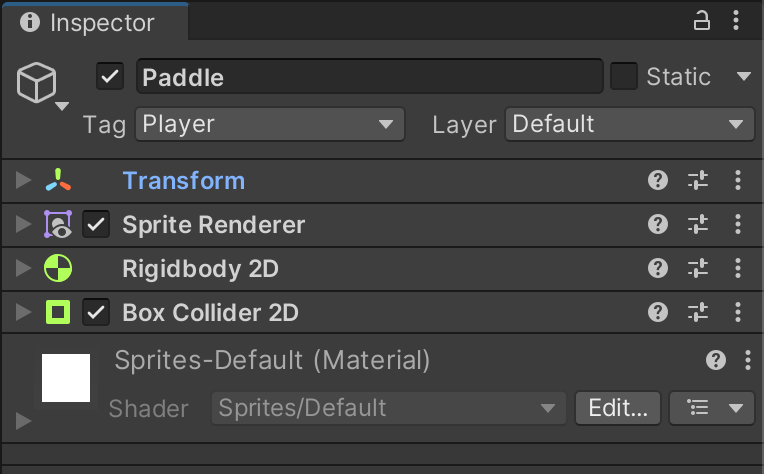
I collapsed each section to make them fit into the picture, so yours probably looks a lot larger. The important part is that you have all the same stuff that I have here.
Next, inside of the Rigidbody 2D settings, I have changed 4 settings.
- Collision Detection: Continuous
- Interpolate: Interpolate
- Constraints > Freeze Position > Y
- Constraints > Freeze Rotation > Z
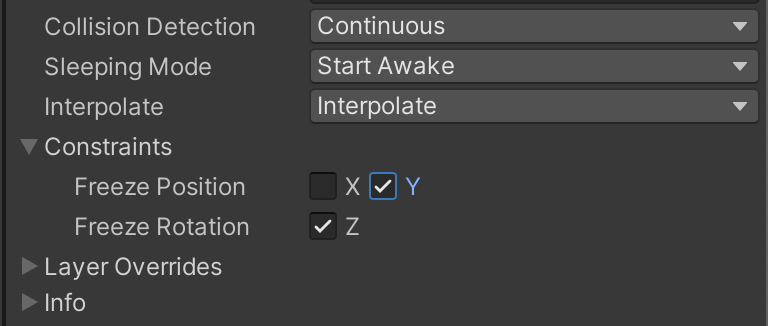
These new settings do the following:
- Make sure the paddle doesn’t stray too far from where it’s supposed to be
- Move smoothly when you press the arrow keys (or a/d), instead of jerking around
- Prevent the paddle from moving vertically (we only want it to go left and right)
- Prevent the paddle from rotating
Scripting Our Paddle
Now we need to add logic to our paddle so we can move it around. Let’s add a new script to the paddle, and call it PaddleController.
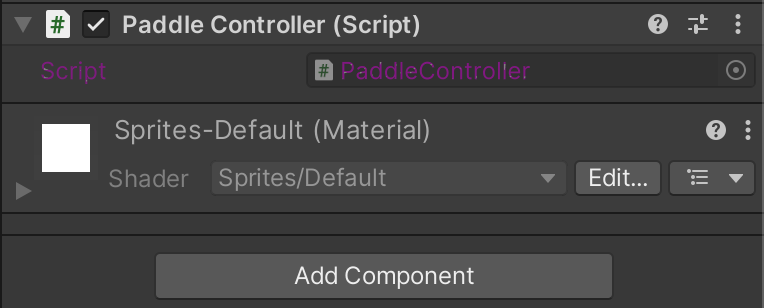
Open up this script in your text editor, and paste in the following code:
using System.Collections;
using System.Collections.Generic;
using UnityEngine;

public class PaddleController : MonoBehaviour
{
    Rigidbody2D _paddleBody;
    float _paddleSpeed = 8f;
    float _inputHorizontal;

    void Start()
    {
        _paddleBody = gameObject.GetComponent();
        _paddleBody.drag = 5f;
    }

    void Update()
    {
        _inputHorizontal = Input.GetAxisRaw("Horizontal");
        if(_inputHorizontal != 0){
            _paddleBody.AddForce(new Vector2(_inputHorizontal * _paddleSpeed, 0f));
        }
    }
}
Let’s go through this script.
Rigidbody2D _paddleBody;
float _paddleSpeed = 8f;
float _inputHorizontal;
Here, we create an empty container of Rigidbody2D type. This will be used to hold/modify the Ridigbody2D properties of our paddle.
We also set a value for the speed that our paddle will move left and right — I’ve set mine to 8f (the f is for float, so you can use decimals instead of only whole numbers), but you can adjust your speed if you want it slower or faster.
Lastly, we’ve created an empty container for our _inputHorizontal. Basically, if the user presses the left arrow key (or a), this will be equal to -1. If they move right, it will be 1. Otherwise, it will be 0.
void Start()
    {
        _paddleBody = gameObject.GetComponent();
        _paddleBody.drag = 5f;
    }
Now, we grab the Rigidbody2D component of our paddle, and store it in the empty container that we created earlier. Also, we set the drag to 5f on our paddle.
WTF Is Drag?
Well, if you really want to know… try setting it to 0f for now. Then go and try out your game.
You will notice that the paddle moves from left to right when you press the arrow keys, but… it just keeps going. Like, forever. Because it has 0 resistance. Setting the drag to 5 adds some resistance, so the paddle moves where you want it, and then comes to a stop.
Feel free to adjust this number as you like — this is your game, not mine! I’m just adjusting the settings the way I like, because this is my game — not yours :)
void Update()
    {
        _inputHorizontal = Input.GetAxisRaw("Horizontal");
        if(_inputHorizontal != 0){
            _paddleBody.AddForce(new Vector2(_inputHorizontal * _paddleSpeed, 0f));
        }
    }
In the Update function (which runs every frame), we check to see what the horizontal input is.
If the user is not pressing the left or right arrow key, this will be 0, and we will do nothing.
If they are pressing one of the arrow keys, then we will AddForce to our paddle (exactly what it sounds like), and move it in the direction that the user pressed.
The AddForce member takes in a Vector2, which is basically just 2 numbers. The first number is how much you want to move on the X axis, and the second number is how much you want to move on the Y axis. Since we only move horizontally, the second number will always be 0 in our case.
If this were a game that involved jumping, or even moving up and down at all — then you would want an actual number for the Y axis.
Anyway, let’s save this file and test out our game.
https://medium.com/media/cf79a8cfcc546542f9278845ebaf007c/hrefOk, we made some progress here. The paddle moves, but when I screen-recorded this demo, it moved WAY slower than it did previously. It shouldn’t be so inconsistent!
The reason for this is because the frame rate dropped significantly when my computer was using resources to record the video. You will run into similar problems too! Unless of course, you account for this in your scripting.
This is where we introduce 2 new concepts.
Time.deltaTime And FixedUpdate
Since every computer performs differently, one of the most crucial things for game developers to understand is how to handle inconsistencies in frame rates — and how to get their games to run consistently across various different hardware.
Since this course is meant to be more about blockchain, and less about Unity itself — I won’t go too deep into these concepts, but I will give a very brief/basic explanation here for our specific application.
Time.deltaTime
Time.deltaTime is a function in Unity that looks at the current frame rate your machine is running at. It gives you a number, which you can then use to “adjust” how often something happens.
For instance, let’s look at the Update function from our code above:
void Update()
{
    _inputHorizontal = Input.GetAxisRaw("Horizontal");
    if(_inputHorizontal != 0){
        _paddleBody.AddForce(new Vector2(_inputHorizontal * _paddleSpeed, 0f));
    }
}
If our computer is running at 10 frames per second, then this function will add a force to our paddle 10 times per second (assuming the user is holding down an arrow key).
However, if the same game is being played on a much faster computer that runs at 120 FPS, then this function will add force to our paddle 120 times in that same second. Which means the paddle will move significantly faster on the better computer, resulting in a completely different game experience.
Now let’s see what this function looks like if we add Time.deltaTime into the mix. Assuming we were designing the game to run at 120 FPS, we could do something like this:
public class PaddleController : MonoBehaviour
{
    Rigidbody2D _paddleBody;
    float _paddleSpeed = 8f;
    float _inputHorizontal;
    float _targetFrameRate = 120f; // Simulate 120 FPS gameplay

    void Start()
    {
        _paddleBody = gameObject.GetComponent();
        _paddleBody.drag = 5f;
    }

    void Update()
    {
        _inputHorizontal = Input.GetAxisRaw("Horizontal");
        if(_inputHorizontal != 0){
            // Multiply by 120 and then adjust for Time.deltaTime
            _paddleBody.AddForce(_targetFrameRate * Time.deltaTime * new Vector2(_inputHorizontal * _paddleSpeed, 0f));
        }
    }
}
All we did was add a target frame rate of 120, and then multiply our force by 120 * Time.deltaTime. There is no point in me recording the video again, but “trust me bro”, it now runs consistently whether I am recording or not.
FixedUpdate
The other solution here (and possibly a better solution in this particular case) is to use Unity’s built in FixedUpdate function. The normal Update function runs every frame, leading to the inconsistencies we discussed above.
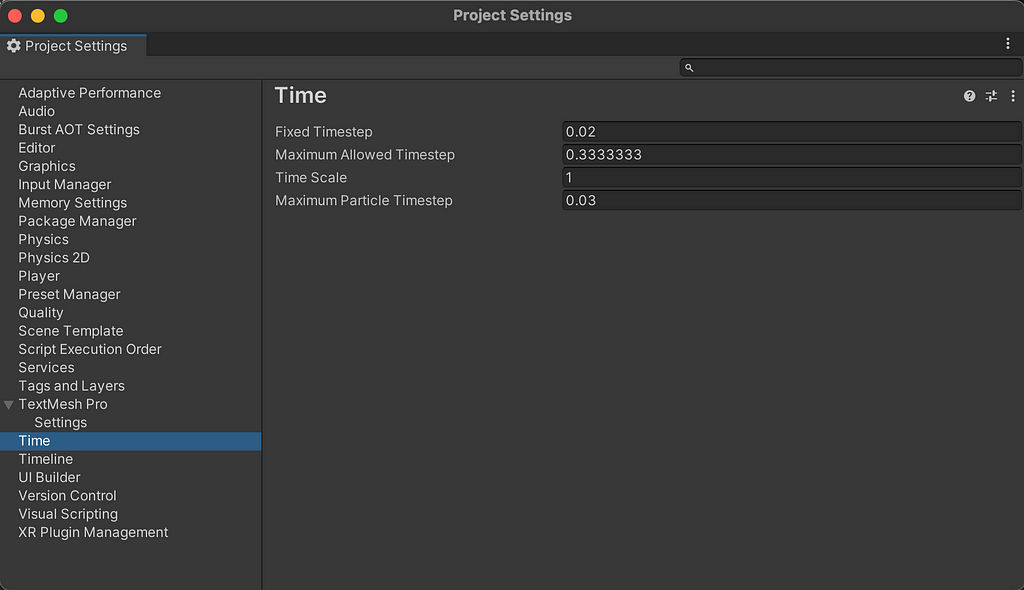
The FixedUpdate function however, runs at a … “fixed” interval. Instead of every frame, it runs every x amount of milliseconds (the default is 20ms, or 0.02 seconds). This simulates a frame rate of 50 FPS, and can also be adjusted by going to Edit > Project Settings > Time in the toolbar up top, and adjusting the Fixed Timestep.
If we wanted to use this method instead of using Time.deltaTime, our script would look like this:
using System.Collections;
using System.Collections.Generic;
using UnityEngine;

public class PaddleController : MonoBehaviour
{
    Rigidbody2D _paddleBody;
    float _paddleSpeed = 16f;
    float _inputHorizontal;

    void Start()
    {
        _paddleBody = gameObject.GetComponent();
        _paddleBody.drag = 5f;
    }

    void Update()
    {
        _inputHorizontal = Input.GetAxisRaw("Horizontal");
    }

    void FixedUpdate()
    {
        if(_inputHorizontal != 0){
            _paddleBody.AddForce(new Vector2(_inputHorizontal * _paddleSpeed, 0f));
        }
    }
}
Small side note — you may notice that I adjusted my _paddleSpeed to be 16f instead of 8f, this is simply because I didn’t like the speed things were moving at. After adjusting for frame rate, it was too slow for me.
Anyway, all we did here was move the AddForce function from our Update function, into the FixedUpdate function. Now AddForce will run at an average of 50 times per second no matter what machine it’s on.
Also, take note of the following line of code:
_inputHorizontal = Input.GetAxisRaw("Horizontal");Notice how we didn’t move this into the FixedUpdate function, and instead, kept it inside the Update function. This is because we want to make sure that the game remains responsive to user input. We don’t want a user pressing a button, and then not getting the response they expect because the game is waiting for another FixedUpdate to run.
Adding Walls
Ok, this article is getting long — so let’s add some walls to our game, and then we will wrap it up for the day.
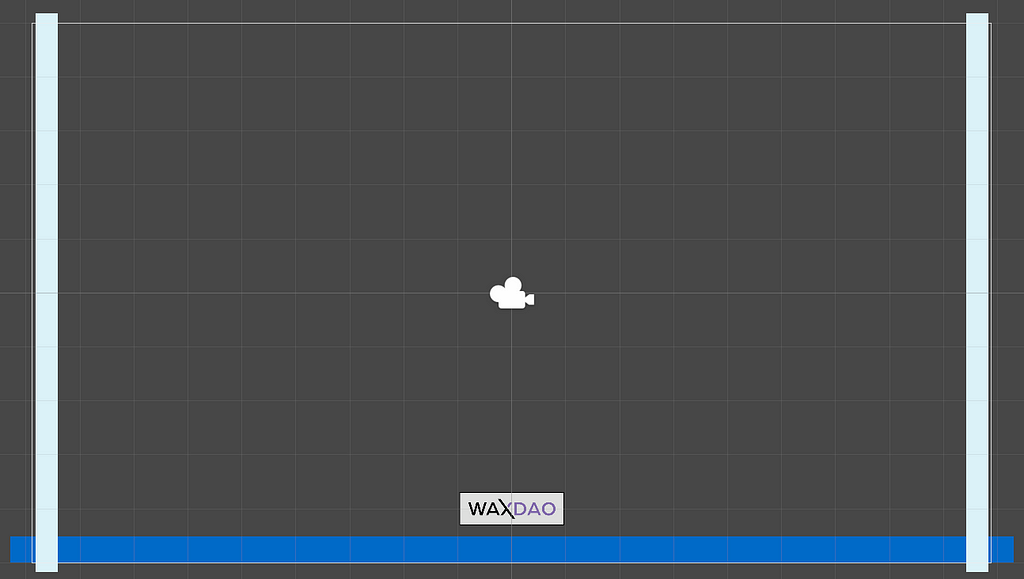
Right click on the Hierarchy panel, then 2D Object > Sprites > Square. Name your object Left Wall.
Since we are using this as the left wall of our game, we need to adjust the scale and positioning of the object. You know how to do this by now, so use the Inspector panel to resize and move the object. You should end up with something like this:

Make sure the walls stay inside of the camera view, or else your ball wont hit them until it’s too late!
Next, we need to add a Box Collider 2D to our wall, since we want to make sure the ball and paddle can bump into it instead of just going right through it.
In the Inspector panel, Add Component > Physics 2D > Box Collider 2D.
Time to add the right wall. Simply duplicate the left wall by right-clicking it and selecting Duplicate.
Rename the object to Right Wall, and then use the Inspector panel to move it to the right side of your scene. Your screen should look like this now:
You’ll notice that you don’t need to add a Box Collider 2D to your right wall, because it has already been applied by duplicating the wall you added a Box Collider to.
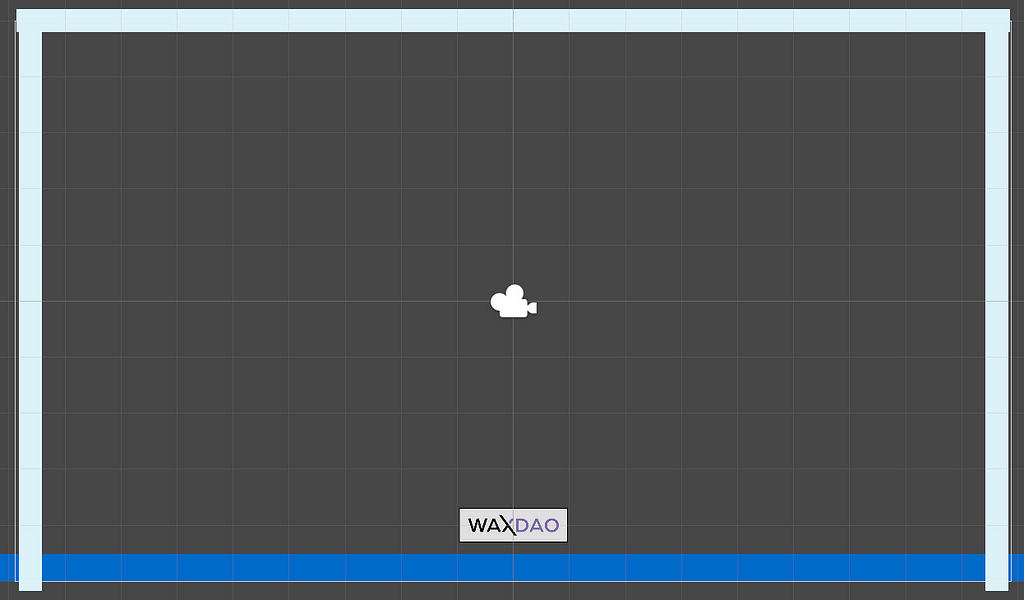
Finally, duplicate one of the walls one more time, and name it Ceiling. This will go up top, and you will obviously need to adjust the Z Rotation of your wall by 90 degrees to make this happen.
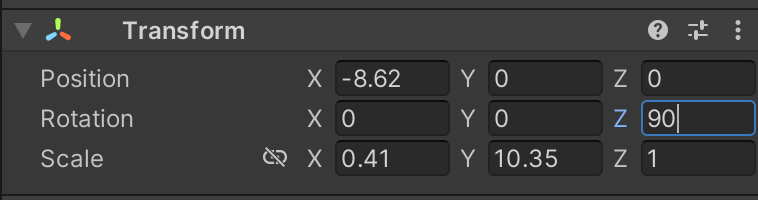
You will also probably need to adjust the scale to make it wide enough to fit across the camera view. The final result looks like this:
Before we wrap up today’s lesson, let’s take this for a test ride and just make sure that the paddle bumps into the walls instead of going through them.
https://medium.com/media/a931cf4b1b6019731949bc6daed9ea57/hrefIt looks good! The paddle stops when it touches the walls, it moves consistently, and the drag property causes it to stop pretty smoothly and quickly when I stop holding down one of the arrow keys.
By the way, I also changed my _paddleSpeed to 24f, just for the record.
Outro
This is it for today’s lesson. If you have any questions, suggestions, or just want to chat — pop into my Telegram or Discord. Also, subscribe to the channel above if you find this content helpful!
In the next article, we will add a ball into the game, add physics to the ball, and bounce it around off the walls! I would like to do more than that in the next lesson, but these articles grow very large rather quickly — so I don’t want to make any promises.
See you soon for part 6!
Create Games On WAX Using Unity, Part 5 — Physics! was originally published in waxdao on Medium, where people are continuing the conversation by highlighting and responding to this story.