WAXHISPANO
Create Games On WAX Using Unity, Part 2 — Letting Users Choose Their API

Create Games On WAX Using Unity, Part 2 — Letting Users Choose Their API
02/22/2024
Welcome to part 2 of my step by step guide for creating Unity games on WAX Blockchain. If you haven’t read part 1 yet, I highly suggest going back and getting up to speed before proceeding with this lesson.
Intro
When building games on WAX, one of the most crucial components for interacting with the blockchain is your API provider. Without a reliable API endpoint, you can not create login sessions, request data from the blockchain, or submit transactions.
In order to keep things versatile and not have to worry about a specific API always being available, it’s best to have a list of different providers. In this tutorial, I am going to show you how to create a simple drop down menu that allows a user to choose their preferred API.
Getting Started
If you recall from part 1, we added a settings button to our Welcome screen. To simplify the tutorial a bit, I’m going to just remove that and replace it with this API dropdown instead.
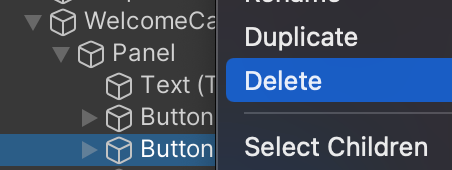
To remove it, we can just right click on the Settings button in the Hierarchy panel, and delete it.
If you’ve followed the tutorial so far, your scene should now look something like this:
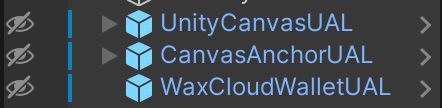
One small thing to note — if your screen looks different because it’s cluttered up with different WAX wallet components, this is because I’ve temporarily hidden mine using the little “eyeball” icons in the Hierarchy panel.
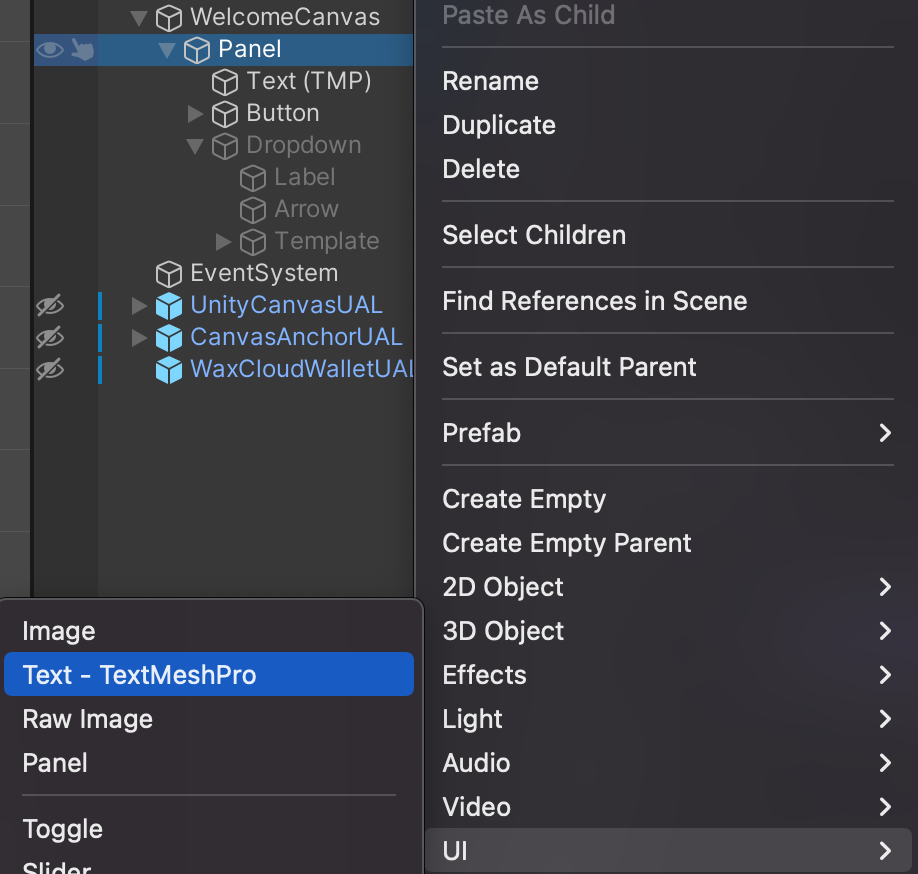
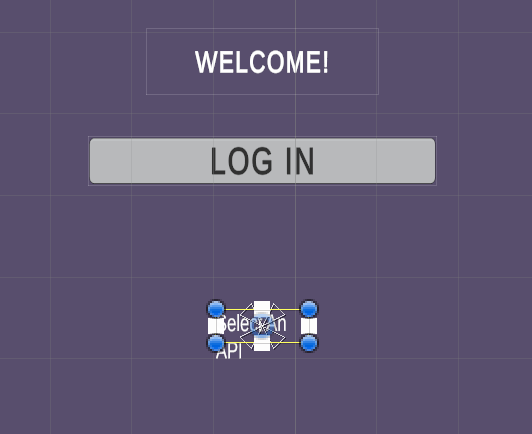
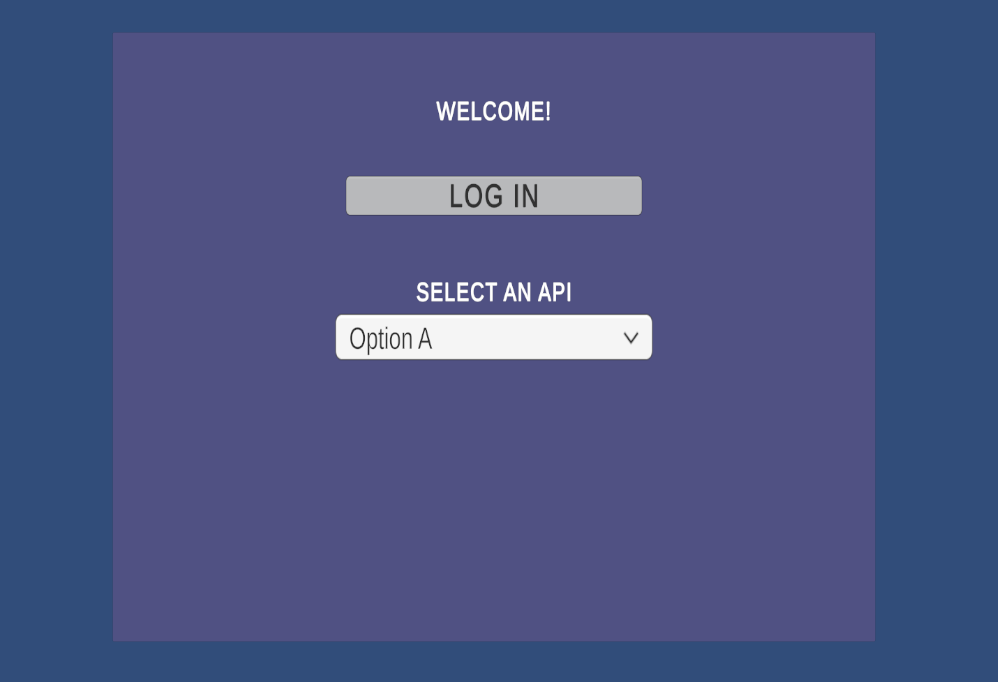
Now that the Settings button is removed, I am going to add a little text that says “Select An API”. To do this, I will go to Hierarchy Panel > WelcomeCanvas > Panel, and right click on Panel. Navigate to “UI” in the menu, and select Text — TextMeshPro.
At this point, you should be familiar enough with this process that I don’t need to keep walking you through each detail. I have named my new TextMeshPro object “ChooseApiText”, and have changed the content of it to say “Select An API”.

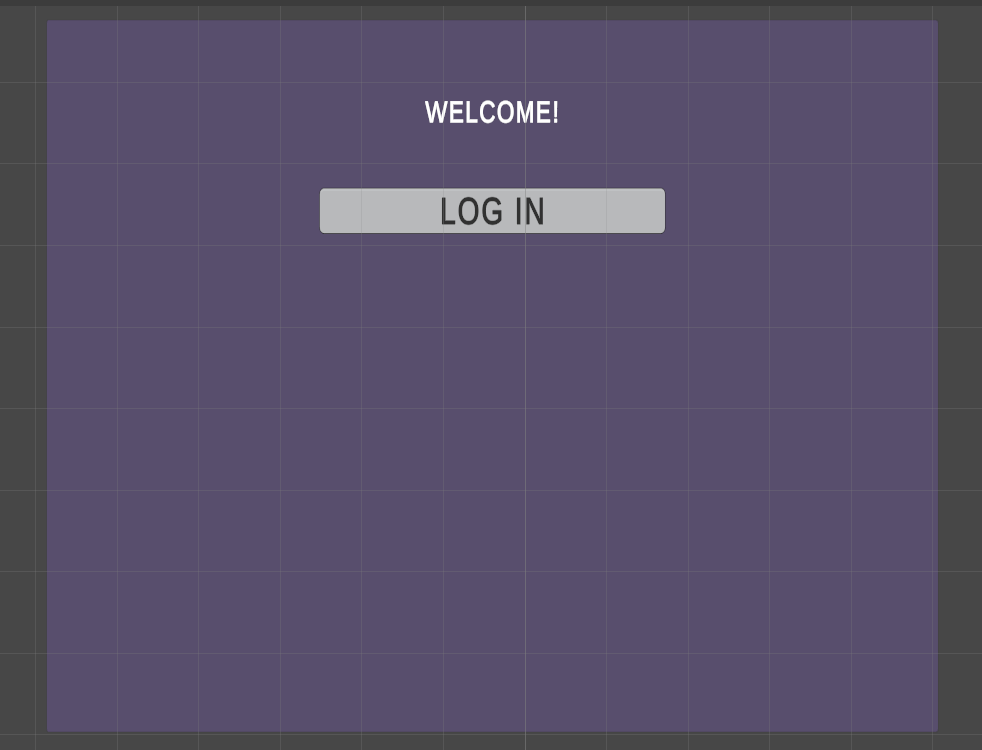
Obviously, our current text does not look so great.
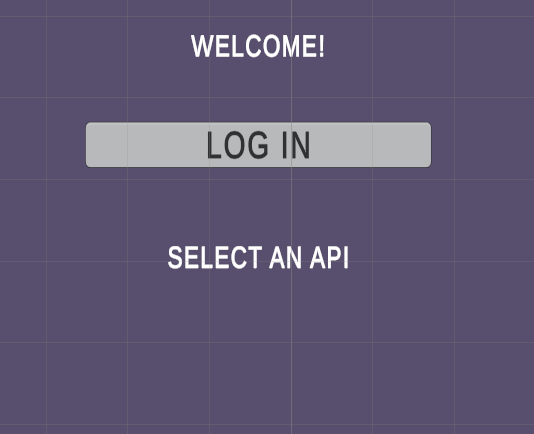
But this is no problem — we can go over to the Inspector panel and adjust the properties of our text object. I am going to change the width, height, position, font-size, alignment, etc. I also changed the text to all CAPS, because I didn’t like the way it looked with lowercase letters. The end result looks like this:
Adding The Dropdown
Now we are ready to add a Dropdown object. It’s the same process as when we added the text object, except this time we will select Dropdown — TextMeshPro from the menu.
So, navigate to Hierarchy Panel > WelcomeCanvas > Panel, right click Panel, and select UI > Dropdown — TextMeshPro from the menu.
If you did that properly, your WelcomeCanvas should now have a Dropdown object inside of it.
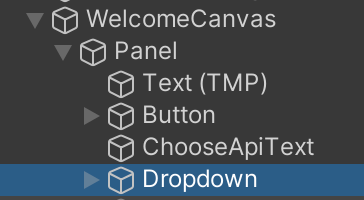
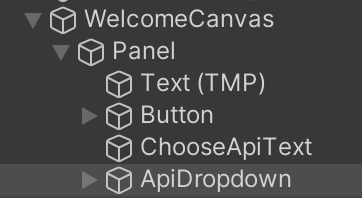
I am also going to go ahead and rename my Dropdown by right-clicking it, selecting “Rename”, and changing the name to ApiDropdown.
Once again, the size of the object is way too small, so I will go ahead and adjust that in the Inspector panel. This one was a bit trickier for some reason, so I had to use a combination of adjusting the scale of the Dropdown, as well as the width / height, and honestly I’m still not all that happy with the outcome — but who cares, this is a blockchain tutorial, not a UI tutorial.
Adding Logic To The Dropdown
Ok, it’s time to start creating our logic for the dropdown menu. For starters, we are going to need a list of API endpoints to add. These can be found at wax.antelope.tools. You can copy the entire HTTP column and paste it into a text file for now if you like.

Next, we will need to use some scripting to take care of the following:
- Use the first API in our list by default
- React to changes in the selected API
- Keep track of the selected API as it changes
- Enable the selected API to persist throughout our entire game (so if a user moves to a new scene, the selected API is still the same).
Global Endpoint Manager Script
For our first script, we first need to create a new game object. We can do this by right-clicking in the Hierarchy panel, and then clicking “Create Empty”. This will create a new game object, which we will then rename to “EndpointManager”.
Once you have your EndpointManager game object created, click Add Component > New Script in the Inspector panel, and name the new script GlobalEndpointManager.
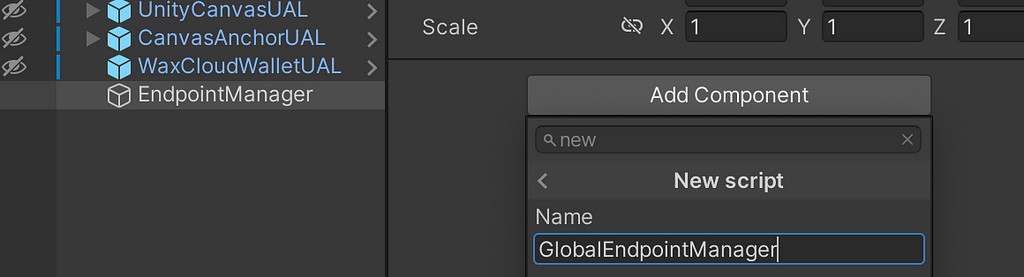
After you create the script, right-click on it and select “Edit Script” to open in in Visual Studio Code. Paste the following code into the script:
using System;
using System.Collections;
using System.Collections.Generic;
using UnityEngine;
public class GlobalEndpointManager : MonoBehaviour
{
public static GlobalEndpointManager Instance { get; private set; }
public string SelectedEndpoint { get; set; }
private static string _rpcEndpoint;
public static event ActionOnEndpointChanged;
public static string RpcEndpoint
{
get { return _rpcEndpoint; }
set
{
if (_rpcEndpoint != value)
{
Debug.Log($"RpcEndpoint has been set to {value}");
_rpcEndpoint = value;
OnEndpointChanged?.Invoke(_rpcEndpoint);
}
}
}
void Awake()
{
if (Instance == null)
{
Instance = this;
DontDestroyOnLoad(gameObject);
}
else
{
Destroy(gameObject);
}
}
}
Let me explain briefly what is taking place in this script. We are creating a new class called GlobalEndpointManager.
The reason for the GlobalEndpointManager Instance line, and for the Awake() function, is basically to make sure that throughout our game, there is only ever 1 manager created (otherwise we run the risk of duplicate objects being created, and different parts of our game not being in sync with each other, etc).
The OnEndpointChanged essentially allows for logic to listen to actions (in this case — the user changing the endpoint).
The SelectedEndpoint and RpcEndpoint are there so that other parts of our game can know which endpoint is chosen at any given time. If you are more experienced than me, you may be thinking that this is redundant — you may be right… as I said in part 1, I’m not an expert at Unity yet and I’m making things work the best I can here.
Anyway, go ahead and save the script — then head back to Unity.
DropdownOptions Script
It’s time to create our next script — this one will be attached to our ApiDropdown that we created previously.
You should understand this process well enough to do it on your own by now. In the Hierarchy panel, click on ApiDropdown. Then, add a component to it — which will be a “New Script”. Name that script DropdownOptions.
Open up the DropdownOptions script in your text editor. Paste in the following code:
using System.Collections.Generic;
using UnityEngine;
using TMPro;
public class DropdownOptions : MonoBehaviour
{
public TMP_Dropdown dropdown;
void Start()
{
Listoptions = new() { "api.wax.liquidstudios.io", "api.waxdaobp.io", "api.wax.bountyblok.io",
"wax.eosusa.io", "wax.greymass.com", "api.hivebp.io" };
dropdown.ClearOptions();
ListoptionData = new();
foreach (var option in options)
{
optionData.Add(new TMP_Dropdown.OptionData(option));
}
dropdown.AddOptions(optionData);
dropdown.value = 0;
dropdown.onValueChanged.AddListener(delegate { DropdownItemSelected(dropdown); });
DropdownItemSelected(dropdown);
}
void DropdownItemSelected(TMP_Dropdown dropdown)
{
int index = dropdown.value;
string selectedEndpoint = dropdown.options[index].text;
GlobalEndpointManager.RpcEndpoint = selectedEndpoint;
GlobalEndpointManager.Instance.SelectedEndpoint = selectedEndpoint;
}
}
This line specifically is extra important:
using TMPro;
This is because the Dropdown we created was a Dropdown — TextMeshPro object. If you used the old Legacy Dropdown object, the script above will not work for you, and will need to be modified — just an FYI.
Essentially what this script does, is update the GlobalEndpointManager whenever a new endpoint is selected. You have this line here:
Listoptions = new() { "api.wax.liquidstudios.io", "api.waxdaobp.io", "api.wax.bountyblok.io",
"wax.eosusa.io", "wax.greymass.com", "api.hivebp.io" };
Which is a list of endpoints on WAX. Remember that list we copied and pasted into a text file earlier? Feel free to adjust the list in this script by adding/removing endpoints as you see fit.
Note that you don’t see any http:// etc in the script. That part is managed elsewhere, so make sure you don’t paste full URLs into the script.
Next, there’s this line here:
dropdown.ClearOptions();
If there are any existing options in the Dropdown (there are — since by default it gives you Option A, Option B, etc), then this line will clear them out before adding the list of endpoints.
This makes it a bit easier to work with so you don’t have to worry about dealing with the default settings and removing things.
Lastly, we have these lines of code:
dropdown.AddOptions(optionData);
dropdown.value = 0;
dropdown.onValueChanged.AddListener(delegate { DropdownItemSelected(dropdown); });
DropdownItemSelected(dropdown);
The first line populates the Dropdown with the endpoints we’ve specified in our list. The second line sets the currently selected item to the first item in our list by default (this is important so an endpoint is selected even if the user doesn’t choose one themselves).
The third line listens to see if the user has changed the endpoint, and the last line calls a function to actually set the Global Endpoint.
Go ahead and save your script, and head back to Unity again.
While you still have your ApiDropdown selected in the Hierarchy panel, you’ll notice that there is a new field in the Inspector window (in the Script section). It will be called Dropdown, and should say “None…” in it. What you need to do is drag your ApiDropdown object from the Hierarchy panel, directly onto this field so it looks like this:
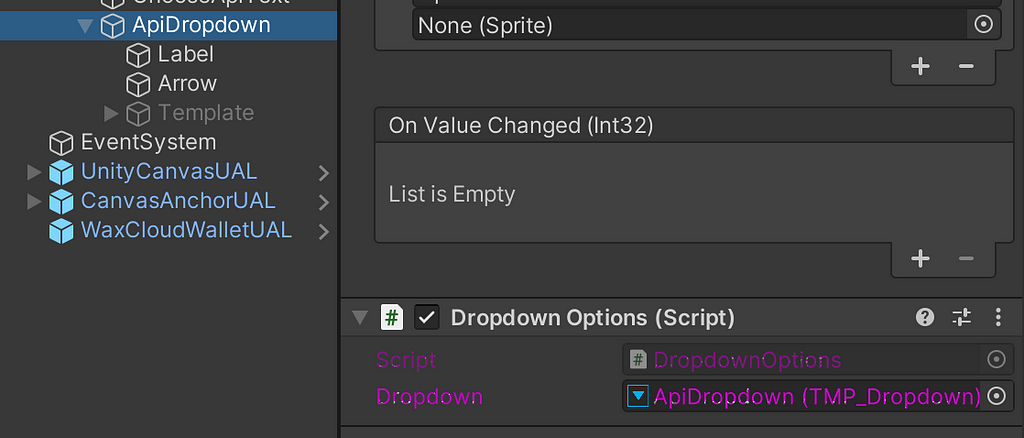
Notice how it says “TMP_Dropdown” in the little window there? This is what I meant earlier when I said that the script will not work if you chose Legacy Dropdown when you created your game object earlier.
If you are unable to drag your ApiDropdown onto this window and it just gets rejected, you likely didn’t use the proper Dropdown format.
RpcEndpointSetter Script
I know I know… LAST SCRIPT I promise. At least for today’s lesson. Currently we can select from our Dropdown, change the endpoint that’s globally accessible… but, we still need to actually use this endpoint to log the user in.
We can do that by clicking on UnityCanvasUAL in our Hierarchy panel. It already has a script added to it, but we are going to add another one. So click Add Component > New Script and name your new script RpcEndpointSetter.
Open it up in Visual Studio Code, and paste in the following code:
using UnityEngine;
using UniversalAuthenticatorLibrary.Src.Canvas;

public class RpcEndpointSetter : MonoBehaviour
{
    void OnEnable()
    {
        GlobalEndpointManager.OnEndpointChanged += UpdateRpcEndpoint;
    }

    void OnDisable()
    {
        GlobalEndpointManager.OnEndpointChanged -= UpdateRpcEndpoint;
    }

    private void UpdateRpcEndpoint(string newEndpoint)
    {
        UnityCanvasUAL unityCanvasUAL = GetComponent();
        if (unityCanvasUAL != null && unityCanvasUAL.Chain.RpcEndpoints.Count > 0)
        {
            Debug.Log("changing endpoint");
            unityCanvasUAL.Chain.RpcEndpoints[0].Host = newEndpoint;
        }
        else
        {
            Debug.LogError("Error changing endpoint. Does this object have a UnityCanvasUAL? Do you have endpoints added to your list?");
        }
    }
}
This is pretty self explanatory — when the OnEndpointChanged function that we defined earlier is triggered, this script will attempt to update the Chain, which is a member composed of several properties (including a list of RPC Endpoints). If you want to know more about that member, you can take a look at the documentation.
Time To Test!
We should be about done with today’s lesson — let’s test out our new Dropdown and see if everything worked properly!
https://medium.com/media/ab68063bc787c4b4795b3059afa346a0/hrefLooks good! If you run into any issues or just want to chat and follow along, be sure to pop into my Telegram, Discord and/or subscribe to the YouTube channel above.
See you soon for part 3!
Create Games On WAX Using Unity, Part 2 — Letting Users Choose Their API was originally published in waxdao on Medium, where people are continuing the conversation by highlighting and responding to this story.